
Step by Step Building Guide
- Get the Parts in this link. The profiles 2020 and 2040 sizes depend on the size of the machine you're trying to build. Mine, is 1010, 100cm x 100 cm, so my profiles 2020, where x2 of 100cm, and 2040 x 3 of 100cm. I tried to get parts, from local distributor; only laser module and the liftable were purchased from Aliexpress.
- As control hardware, I decide to use the easy to find Arduino UNO (I have one already) which have a CNC Shield, the v3, and have enough hardware to drive a machine with x-y movements, also the laser module. BE CAREFUL, this is important, I made a mistake not putting a jumper in Enable pin, then NO DRIVE will respond in CNC Shield, so put that jumper FIRST.

- NOW, time to test the Arduino UNO with the CNC Shield v3, so, we need a software for send to Arduino UNO the gCode commands, this time, we will use the OpenBuilds CONTROL software, a great one, good GUI, but have a little problems to upload the firmware to this board, this is why I download the Arduino IDE (v 1.8.19) to upload the gnea/grbl firmware v1.1 into the Arduino UNO board.
- Once downloaded the firmware, unzip it, and copy grbl folder into the Arduino IDE libraries folder (normally located in Documents/Arduino/Libraries), then, open de Arduino IDE, and be sure, the board is set with "Arduino UNO", plug the board into the usb port, and choose the port where it is connected. Open Examples->grbl->grblUpload, push Upload button, DONE. (ignore the red message of warning about the memory usage -92%- the firmware will be OK)
- Execute the CONTROL software of OpenBuilds, if your Arduino UNO is connected properly, this will detect in which usb port is connected to
- Build as the diagram bellow indicates, this is how we will test the CNC Shield, using the CONTROL software
- DONE, the motor axis move according our orders through the OpenBuilds CONTROL Software, which sends gCode commands to Arduino UNO plugged into the USB port, then this board through CNC Shield v3 drives the motor plugged in x-axis (do the same, probing all the other axis, or better, plug more motors).
- BEWARE to power off the 12V power supply, and unplug the Arduino UNO from usb port before you plug another motor, or change it to another driver, just for safety.
- The original ACRO System comes with GT2 6mm wide pulley of 14 teeth. Here in my country, the local distributors have no 14 Teeth pulley, so, I decide to change it to 20 Teeth model. Now, I need to update the settings of the grbl firmware, fortunately, this can be done using the OpenBuilds CONTROL Software; but first, we need to calculate what values will be updated in the $100 and $101, the micro steps for X and Y respectively.
- Now we have those values for X and Y axis, we update grbl setting through OpenBuilds CONTROL software as shown in the bellow picture:
- First, in CONTROL, choose the grbl settings tab, then search in the settings list, the values $100 and $101 for set them to 80 (both in this case); and voila, those values where tested and in the real ACRO System FRAME, they do the magic.
Cabling: a "nightmare"
Here the cabling thing. Many cables, many issues. But here, you must focus carefully, an error and KAPUT, specially with the DC Voltage polarity; in Laser, what requires 3A Input. The cables I put for power the Laser module are 20AWG, so, it will be NO PROBLEM at all...

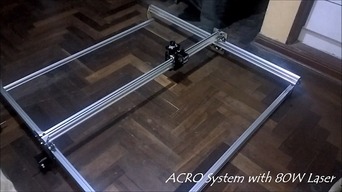
ACRO System w/Laser 80W
Build in 'Laser Cutter Builds' published by David E. Flores E., Aug 29, 2024.
This is my version of the OpenBuilds ACRO System CNC, a 1010 version (1000mm x 1000mm). I need this machine to build PCB prototypes within 2-days at maximum. I will try to build PCBs using drill and laser methods...
-
-
Build Author David E. Flores E., Find all builds by David E. Flores E.
-
- Loading...
-
Build Details
- Build License:
-
- MIT Licence (MIT)
Reason for this Build
The need to build PCB at 2-days max rate timeInspired by
the need to no depends on other people to get a prototype right now!!! -
Attached Files:
Parts list
Qty Part Name Part Link Comments 3 GT2 pully 20 Teeth 6mm with and 2mm ptich https://naylampmechatronics.com/cnc-open-source-hw/116-po... Link The most easy to find here around my "galaxy" 2 Micro Limit Switch Plate 6063-T5 Aluminum Plate https://vi.aliexpress.com/item/1005005697052778.html?spm=... Link Plates for holding the x2 endstop switches 1 5m lot GT2-6mm open timing belt width 6mm GT2 https://es.aliexpress.com/item/10000401582873.html?spm=a2... Link This is for move X and Y Axis 1 DIY OpenBuilds ACRO Acrylic Plate Set High Gloss S https://vi.aliexpress.com/item/1005006750591477.html?spm=... Link Plates in acrylic for ACRO SYSTEM CNC -
-
Attached Files:
-


